Let’s learn together the below Concepts related to D365.
Advanced Warehousing satisfy business requirements such as license plate tracking, replenishment, cluster picking, cross docking. it is Configurable and Query Based.
Core Configuration:
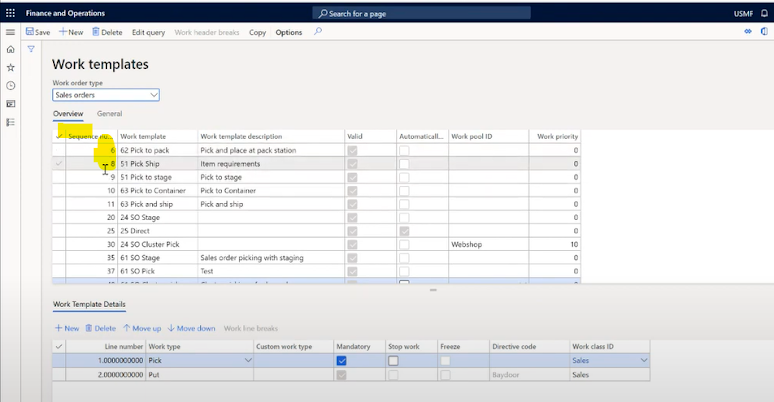
Wave template: define the process performed by the system to create work. This is an Engine that execute a process based on business logic that combines (Location directive, work template and demand line – SO) to generate WORK.
(Tips - automate creation, processing and work release by wave | Parallelize allocation (Parameter> general > process wave in Batch) & wave process method > allocate wave. task configuration will only be enable). - Mentioned this at the end of this Blog.


Fundamental Configuration:
- Storage Dimension group: Enabling WMS activates a specific set of inventories dimension.
- Tracking Dimension group: Allow Batch and serial tracking in WMS.
- Reservation Hierarchy: Define how inventory is allocated (Order line)
- Standard Hierarchy: Site >warehouse > Inventory status > location and License Plate.
- Unit Sequence group: Define the nested handling unit used in a warehouse.
- Site/warehouse/Location: Represent the distribution network.
- Wave template/Location Directive/work template : Core configuration the drive the how/where/what of warehouse process.
- Release to Warehouse/Wave – Process to create work.
- Loads <Shipment <Container – Hierarchy of transit.
- Work – Transaction comprises of Pick and Put
- Mobile
Setup: Configurable Menus & Menu items | Workers | Defaults setups
Business
Process Demo:
- Receive Purchase Order
- Cycle Counting
- Move Inventory
- Pick and Ship Sales Order
- Receive return order.
1.Receive
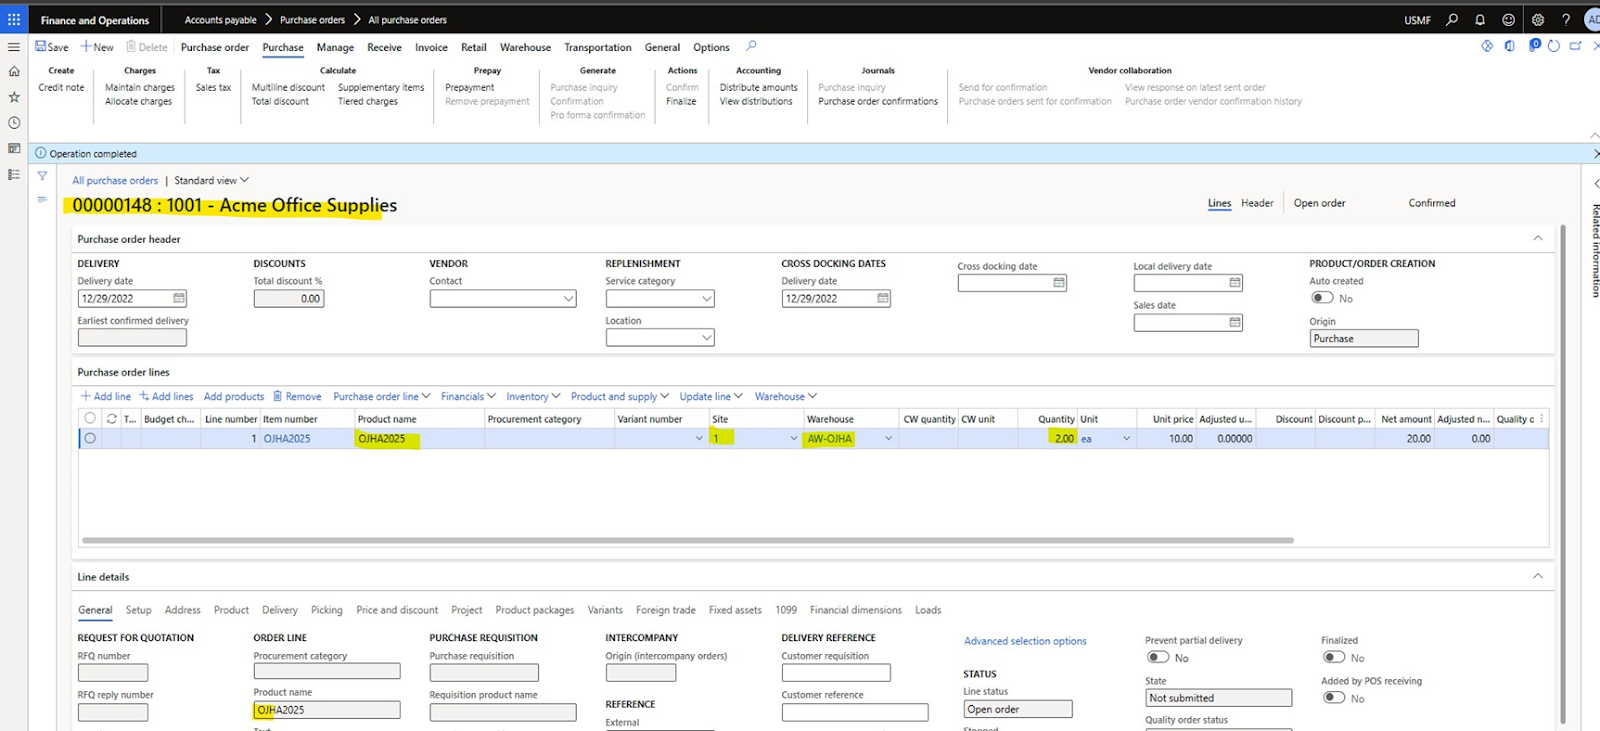
Purchase Order: Create a PO, enter Item/Qty and receive that
item via Mobile app – Go to inbound option on mobile emulator and
click on Purchase Receive menu then enter the PO & item no and
Qty (you can give partial Qty to receive here. Once done It will show you the
status that work is completed (at this time you have just registered the
physical inventory on you warehouse (Here you should click on product receipt)
Now
let’s see the work ID that system has generated (on work ID you can see the Target
License Plate, and on lines - Pick (receive or R1) and Put
(FL-001) location (this has been determine by location directive)
Now take the TLP and scan again on Purchase Put way menu on mobile emulator. Here you can see item with TLP Info as where it is sitting now in inventory (i.e., R1 or receive) with the help of Purchase Put way menu option we are moving that item from R1 on FL001 Location with TPL.

2.Move Inventory
– Go to inventory menu on mobile emulator, Scan the same TLP, and move the QTY
on location FL-005 – (If you will move partial Qty it will assign a new TLP)

3.Cycle Counting:
Go to Spot counting on Mobile app, Enter item FL-005 and Put TPL. If you see that
actual count was 12 then, you can update the same on Cycle counting pending menu
on D365.
4.Pick and Ship Sales Order: Create SO with Same item & reserve the Qty (click on reserve a lot) then click on release to warehouse (here a wave ID will be posted, and work ID will generate) .Now click on work ID (Here on work you can see location as Pick (FL-001) and Put (Baydoor)Again, go to Outbound and click on Sales picking process and Scan the work ID. The inventory will move to FL-005 to Baydoor Location.
Now to complete the shipping process – Click on Load on SO – it should be on loaded status > Click on Outbound shipment > post the packing slip from Load too & click on Invoice.
5.Receive return order. You can also perform return order if the Qty shipped is not good. For that go to all return order then click on Find SO and change the Qty that you want to return on lines.Then click on Send return order menu (that will generate the document for customer) the again go to Inbound on mobile app and click on RMA receive (Here you need to give LP not TLP.) We do have disposition code function on return order like RMA credit or RMA scrap you (this is based on location Directive setup & route that will bring the item back on Return location and after Qty check eventually to inventory). now Go to RMA put way menu and compete the work.
Demo :

 2 Click
new> enable Use warehouse management (Yes) then Save.
2 Click
new> enable Use warehouse management (Yes) then Save.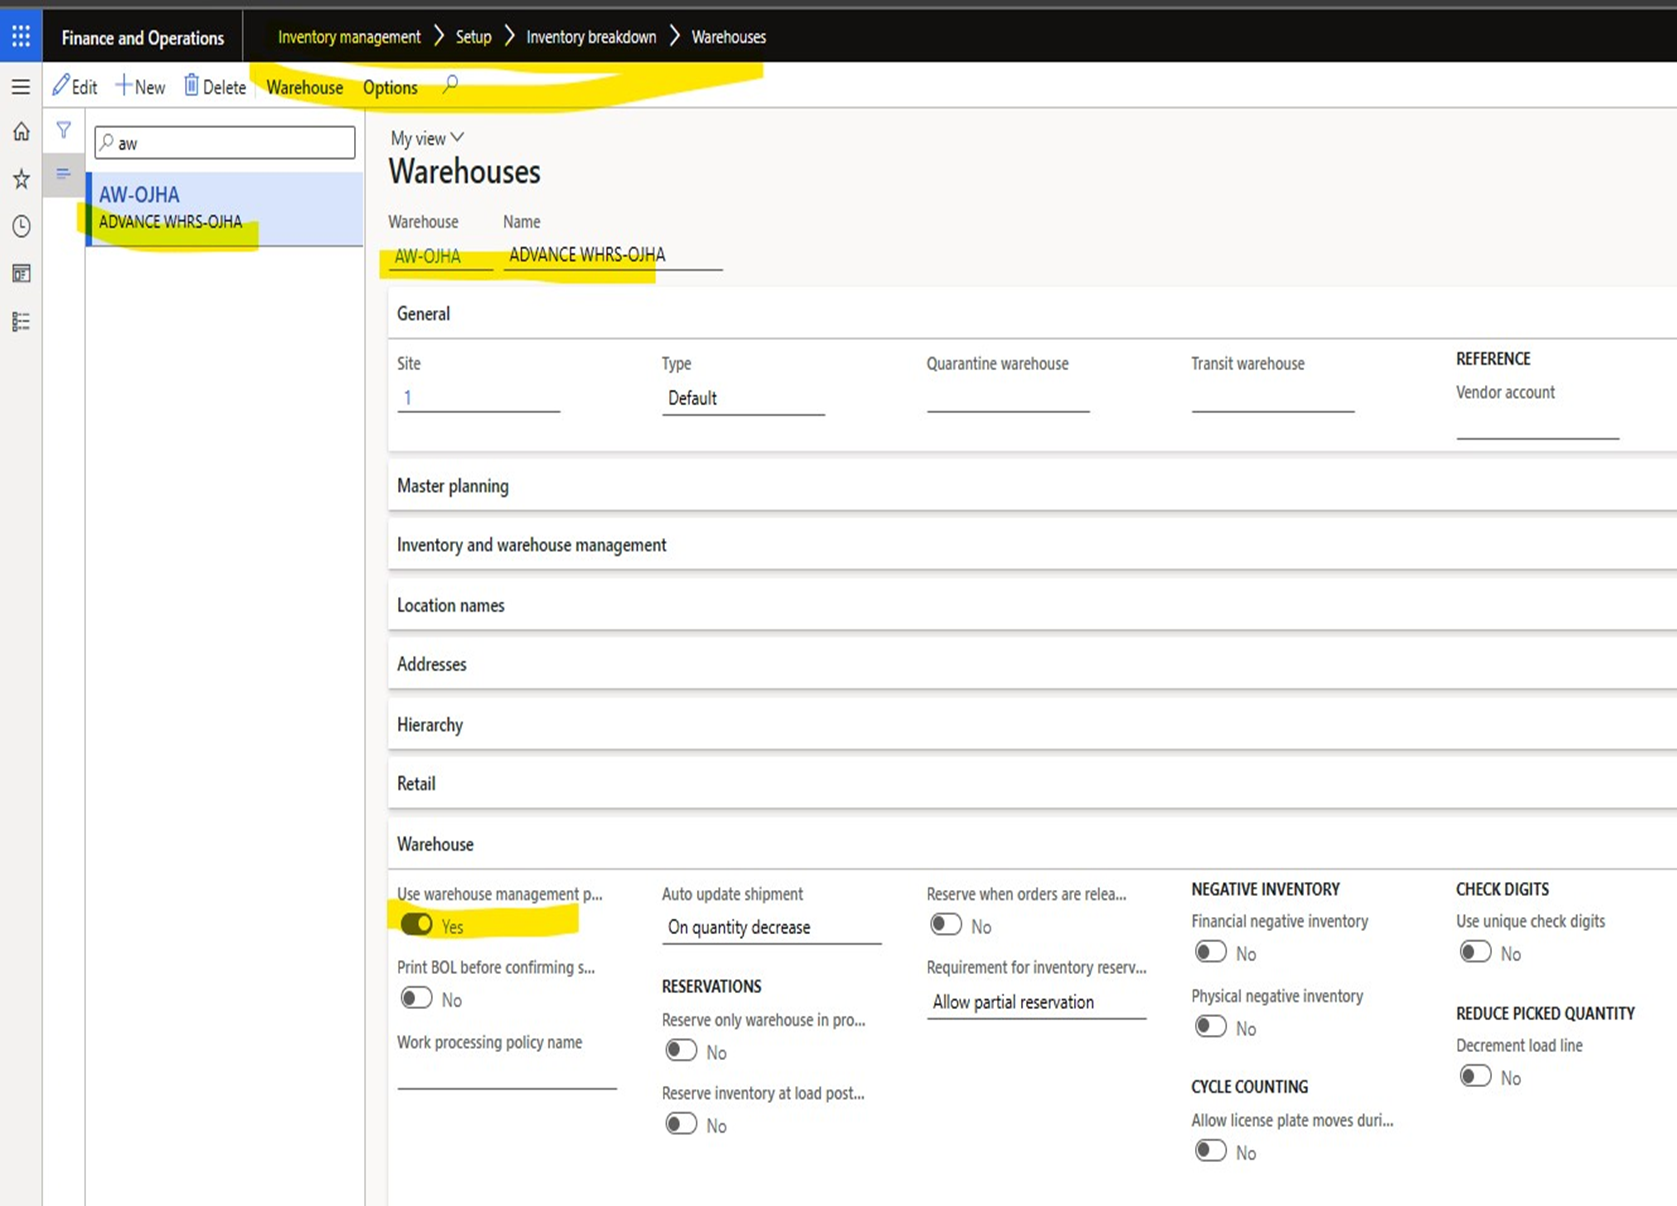
3. FYI- on hand Inventory with Location License plate Inventory status


4. Reservation Hierarchy - Means – Order of Storage dimensions
1st Site will be reserve and Warehouse and so on…
here you will have Batch above and Batch below Location concepts.


All possible units in which I can do the inventory transactions. (Like receiving an item. (Item : OJHA2025)

6. Inventory Status – it’s a blocking control over inventory

7. License Plate : is a handling unit, treat it as a label or Tag.
Its unique in a warehouse.
One LP can be present in 1 location of that warehouse.
It can be transferred from one location to another location.

8. Create an Item with Advance storage Dimension.


receiving/Staging/inventory/stock/shipping/Baydoor
2.Location format – what should be the nomenclature of location : R1,R2, (receiving) B1, B2,(Bulk) S1, S2 (Staging)
3. Location profile : Feature/constrain/Rule +above 2
Use LP tracking for Receiving and shipping location – this means location can handle LP. Not mandatory for other location
1. Manual
2. Wizard


Location Profile - Bulk

Location Profile -
Shipping

Location creation
process- Manual

Location Creation process- WIZARD   FYI - One
more view FROM ADVANCE WAREHOUSE OJHA  10. Location Directives : Decides and assign Pick/Put location in the created work ID.
Work Template : Simply create Work ID for a Particular Process |


Next –
Click on EDIT query- Click create – GROUPING OPTION – click Yes.

Default receipt location = R1

Location Directives


Now let got to Menu Device setup & worker setup
Menu Device setup & worker
setup
Mobile device menu item: the actual
Button for designated process:
Purchase order (receiving menu
item)
Create menu.
Crete menu Items
Put menu item under proper menu.
https://trial-6jj21g.trial.operations.dynamics.com/?cmp=usmf&mi=action:WHSworkExecute

User or worker Setup


Mobile
device menu

12. Purchase Order receiving Type : Mobile Device :
1.  Purchase order item receiving : Receive PO item on
default warehouse receiving location.
Work is created and not processed.
Purchase order item receiving : Receive PO item on
default warehouse receiving location.
Work is created and not processed.
2. Purchase order item Put away : complete the
existing work created in step above.
3. Purchase order item receiving
and put away : receive and transfer item to correct put location
1. Purchase order line receiving
2. Purchase order line item
Put away
3. Purchase order line item
receiving and put away
1. License Plate receiving
2. Load receiving
Purchase
order item receiving - Mobile device


13. All
Setups are Done.
Let’s create an PO and receive the item through ADVANCE WAREHOSE

Received the PO through Mobile Emulator .
 14. Work Created on PO

15.

Thank you Please let me know if you have any Questions.
Tips :
- Automate creation, processing and work release by wave
- Parallelize allocation (Parameter> general > process wave in Batch)
- wave process method > allocate wave. task configuration will only be enable)


Containerization Twice.


Location Directive :


- Waves: a collection of order line released to the warehouse for processing
- Load: Physical shipping container |Shipment: Delivers to Customer
- Work: Transaction performed by end user to complete the Business Process
- Cluster picking is a piece picking process that lets you pick items for multiple orders at the same time by clustering them into pick clusters.
Comments